
Toddler Busy Board
Paul took the day off on Monday since I am on spring break this week and we finished up Theo’s busy board. It was perfect timing since Theo will be home with me more than normal, I wanted to make sure we switched things up in the toy department to keep him engaged. I pretty regularly switch around his toys, putting some away and getting others out, so there is always something he hasn’t seen in a bit out. Now that’s not to say we have a million toys, because we don’t, I just limit what he has available to him to encourage him to play deeply with what he has.
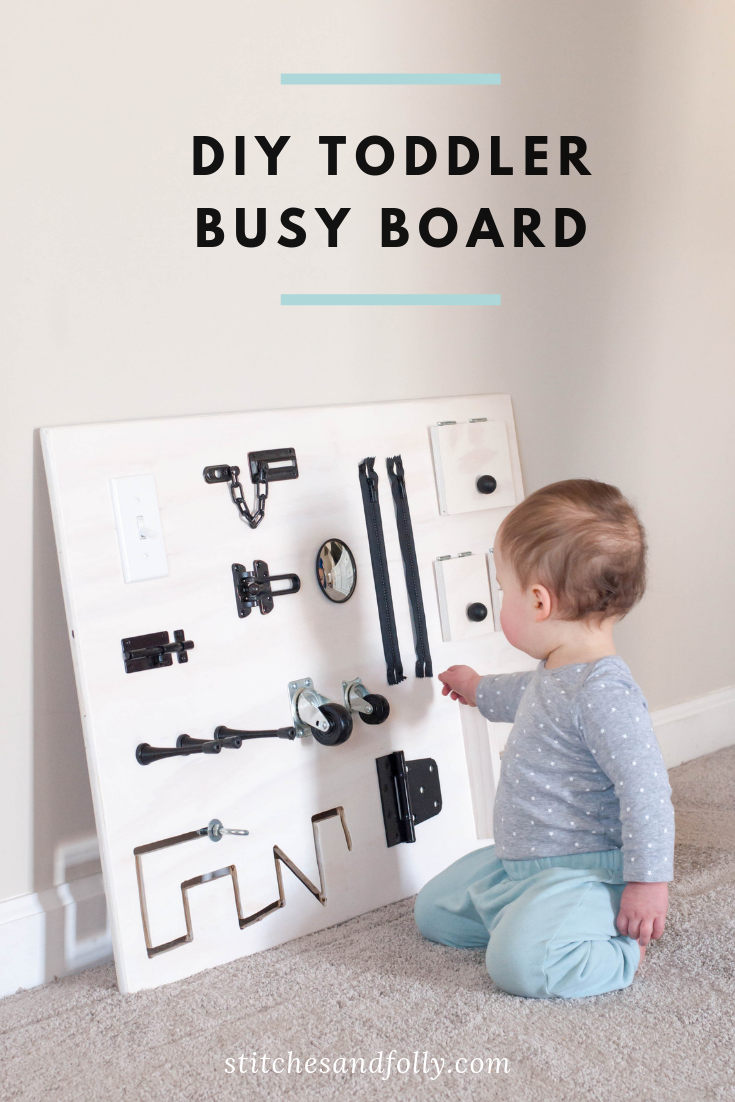
Onto our busy board! There are so many different items you can put on a busy board - some of the items on ours are slightly above his skill level right now (like the bolt maze), so this board will really grow with him. Let’s break down the anatomy of our board.


So if you want to make your own we suggest using a 3/4” piece of plywood. The length and width of yours could vary, but we made ours 2’ x 3’.
We started by sanding the board down, you can’t tell in these photos but Paul also routed the edges to have a nice curve. That’s not a necessary step, but I would suggest sanding the edges to not be so blunt.
I applied 2 coats of a pickling stain, and then sealed it with 2 coats of a water based poly.
Paul then routed out the maze section.
Finally we laid out and attached all of the odds and ends. Paul was careful to place items so they wouldn’t hit anything else when being played with.
Deciding what to put on Theo’s was a challenge, there are so many more elements I would have loved to add, but I’m sure we will make another one. Theo has loved the door stops the most so far, we’ve heard the lovely boing noise they make quite a bit. Our goal is to mount it on a wall in the playroom (once that room is done), until then he plays with it flat on the ground because he accidentally knocks it over if we just lean it against the wall.
Everything you can buy at the hardware store, or rooting through your own stash of odds and ends. We made the sliding bead frame, if you are interested in a tutorial let me know! I am always planning the next DIY we can make for Theo, so please share some of your favorite projects you have made for your kid, niece/nephew, or BFF’s offspring!
The following are amazon affiliate links to some of the products or your busy board DIY, if you purchase though our links we receive compensation to help up keep this blog going!


